
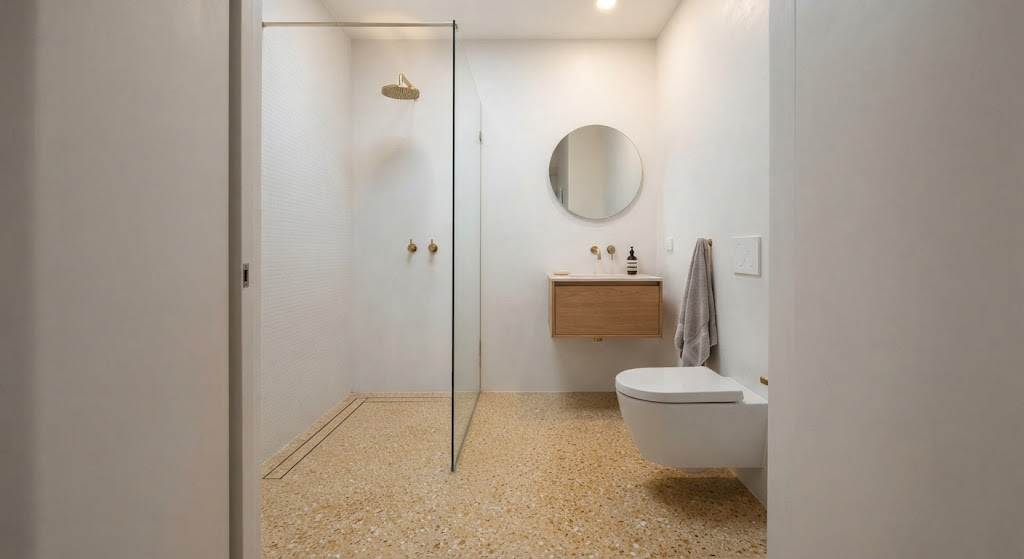
When a Wet Room Makes Sense
Most people think wet rooms belong in spa hotels or airy European lofts with floor-to-ceiling marble. I've designed them into 35-square-foot Silver Lake apartment bathrooms and never looked back.
The math is simple: a traditional bathroom breaks the floor into dry zones and wet zones, separated by a shower curb, a glass enclosure, or a shower curtain. Each boundary consumes visual and physical space. Remove those boundaries, and suddenly your three fixtures — toilet, vanity, shower — share one continuous floor area without sacrificing a single inch to a shower tray or swinging door.
A wet room is not a style choice. It's a spatial decision.
The Real Minimum Dimensions
You need 36 inches of width and 48 inches of depth for a code-compliant shower zone in a wet room — and that's if you're smart about fixture placement. I typically draw the shower zone at the far end of the room, with a linear drain running across the width where the floor slope begins.
In a 5x7 bathroom, here's how it breaks down:
The dry side runs the first 36 inches from the door, holding a wall-hung toilet and a 24-inch vanity on opposite walls. The remaining 48 inches becomes the wet zone, separated by nothing more than a fixed glass panel — no door, no curb, no aluminum track collecting soap scum.
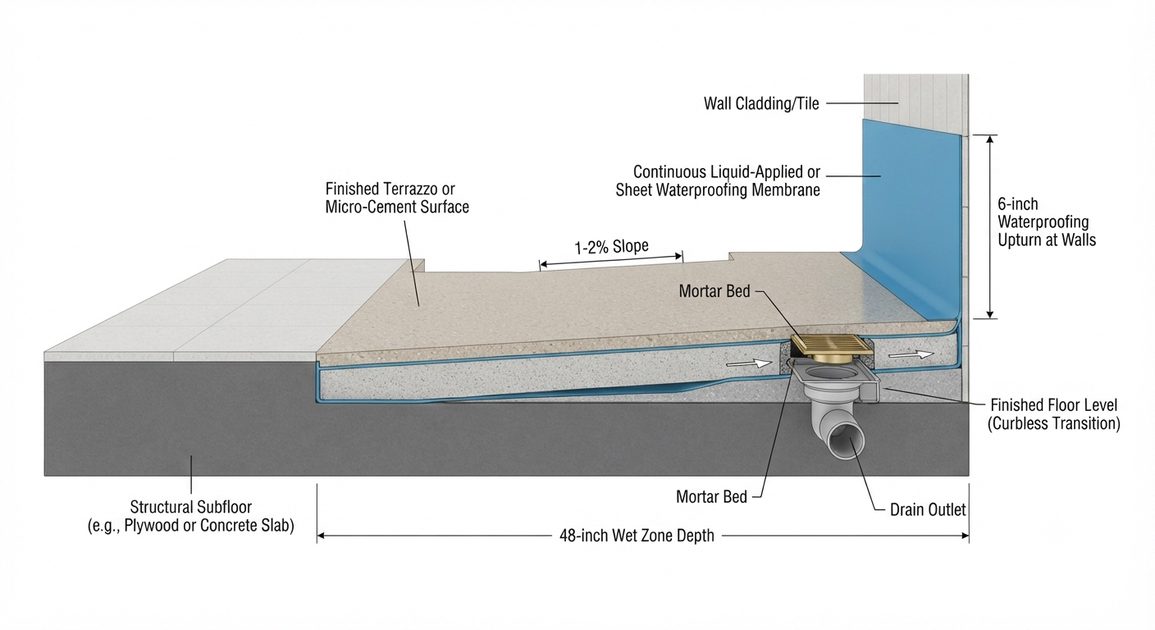
The toilet stays dry because it's outside the spray radius of a properly placed showerhead. The vanity gets a waterproof front panel and a wall-mounted faucet to eliminate deck-mounted hardware that would sit in splash range. Every surface tilts at a 1-2% slope toward that linear drain.
The Floor Logic Nobody Walks You Through
A curbless wet-room floor requires either recessing the subfloor or building up the dry area on a mortar bed. In a ground-floor condo or single-family home, recessing is the cleaner option — but it's structural work that requires an engineer. On upper floors or in apartments with concrete slabs, I build up the dry side with a lightweight mortar bed and waterproof the entire floor as one continuous membrane, extending the waterproofing at least six inches up every wall.
This is the moment most people flinch, because the number sounds big.
Here's the counterpoint: you're eliminating a shower pan, a glass door, a shower curb, and a standard shower enclosure. On a recent Silver Lake project, the fully waterproofed wet-room floor added roughly $800 in materials and membrane labor — and saved $1,200 on the glass door alone. The numbers can work in your favor if you count them honestly.
Do You Need One? Ask the Right Question
Don't ask whether a wet room looks cool. Ask whether your bathroom's footprint is fighting itself. If you're in a 5x6, a 6x6, or an awkward narrow rectangle where a shower enclosure would create a dark corridor, a wet room is probably the most practical answer — not the most aspirational one.
I'd pick a well-executed wet room over a bad traditional layout every tim